30 Days to Organize Your Kitchen
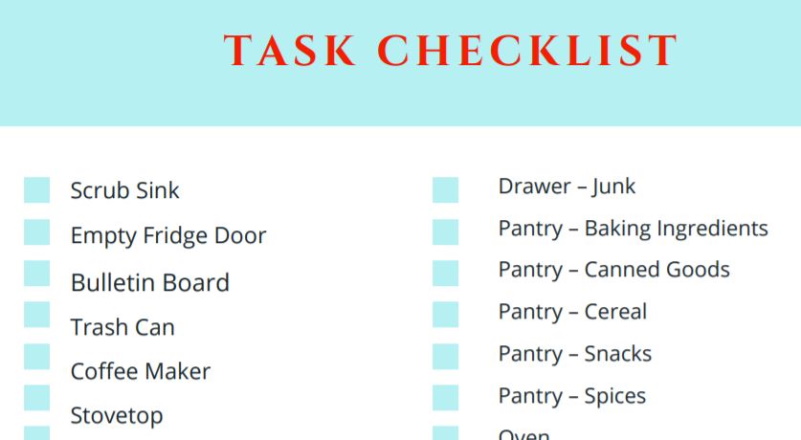
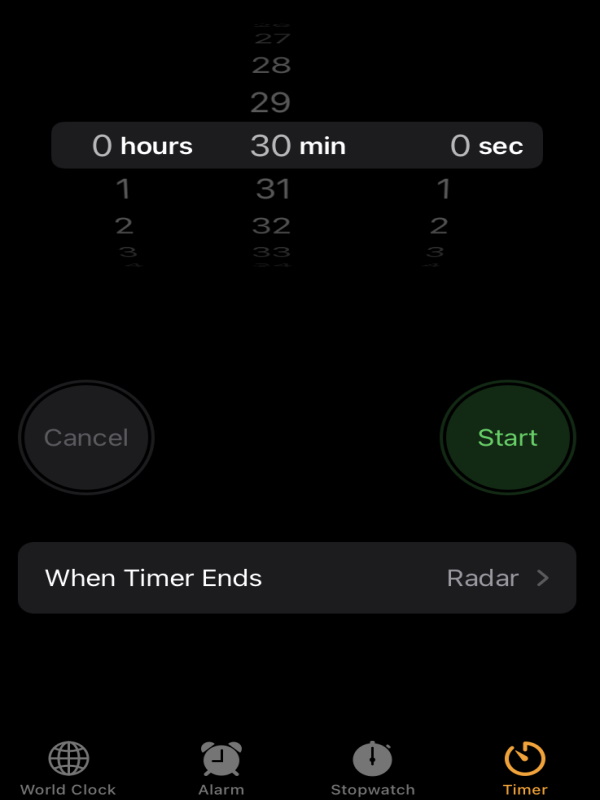
Yes, you really can organize your kitchen in 30 days by spending only 30 minutes per day working on clearing the chaos. All you need is a checklist and a timer.
Clutter is overwhelming and stressful.
I know how frustrating it is to work in a kitchen that is disorganized.
- Food expires.
- Money is wasted.
- Tools are lost.
- Time is lost trying find items.
- Duplicate items are purchased.
All of those make my temper flare. And if I am being honest, that is an ugly thing. The dogs hide. My husband heads to the basement. The cat stares at me like I have two heads. Because, cats do not hide from tempers. They judge.
The reality is, you do not have to continue in the kitchen chaos. You can achieve organization without freaking out.
By working on small tasks, one step at a time, you will eliminate the clutter and regain your sanity.
My kitchen is not the largest room in the house, but it sometimes feels like it is. Those cupboards hold a whole lot of stuff!
The thought of trying to clean, sort, organize, and otherwise deal with the whole thing all in one shot is just too much to handle.
That old saying about eating an elephant one bite at a time definitely applies here.
Create a Plan
I know I work best when I use checklists. I know I work really well under deadlines. I put those two things together in this plan.
I decided that I could spend up to 30 minutes each day, for 30 days to clean up the whole room. I am confident I can set aside 30 minutes daily. I imagine you can, also.
I made a checklist. I broke down the whole job into small chunks (elephant bites, you know). I wrote out that list and put it where I could see it.
As I completed an item from the checklist, I crossed it off. That feels good!
I decided to tackle the areas that would have the largest impact first.
- Sink – very visible and basically a self-contained area.
- Fridge door & Bulletin board– large space but simple to clear up. Also allows me someplace to hang my list.
- Coffee pot – we use this multiple times a day – big win!
I saved the more complex tasks for later in the process:
- Cleaning the oven.
- Sorting and cleaning the freezer.
- Organizing the pantry goods. (I even broke this task down into even smaller bites!)
You can get a copy of my printable checklist by clicking here.
Manage the Time
A kitchen timer can be your best friend.
While I am sure you use the timer to make sure you haven’t burned supper, it can also be a great tool to help you manage the time you spend on each one of these tasks. I also use the timer feature on my phone.
When I am ready to start my daily task, I set the timer for 30 minutes. At the end, I hear that buzz and know that I have finished my commitment to work on this project for 30 minutes.
Sometimes 30 minutes is more than enough time to complete the task for the day. Other times, I need more than 30 minutes. In that case, I can decide how much longer I need to complete the checklist item. Then I can determine if I want to continue working “today” or save the rest of the chore for “another day”.
At the end of 30 minutes, I treat myself to a reward. I have a cup of coffee, I read a chapter in my book, or I play a game on my phone.
Action Steps
There are simple action steps to take in order to complete each one of your checklist items.
Empty:
Remove everything from the cupboard, counter, drawer, or other space that you are tackling. Take it all out and make a pile on the floor or the table. If you have a large number of items, use a laundry basket or box to contain them while you work on the space.
I have one drawer for all those large spatulas, spoons, and miscellaneous utensils. You probably have one, too. Mine holds all the things that do not fall into the simple category of : dinner knife, fork, spoon. Over time, the drawer has become an absolute zoo of utensils. Not only is it nearly impossible to find the tool I need, but the drawer has developed a habit of jamming.
When I get to this drawer on my list of 30 Days to Organize Your Kitchen, every single item in the drawer is removed and placed on the counter. I used a clean and dry dish pan to hold the entire collection.
Clean:
Hot water and soap are your friend. Use other cleaning supplies according to work area and your preference. Vinegar is a great cleaning product that you have on hand. Wash or clean every nook and cranny of the space as well as all the items you are putting back into it.
That utensil drawer recieved a good spray of cleaner and a completed wipe down. Same thing happened to the front of the refrigerator. Every shilf and drawer inside the fridge was also scrubbed clean of any dried drips. I needed sunglasses to look inside the fridge after that cleaning spree.
Sort:
Go over that pile with a fine tooth comb. Check for expiration dates and broken seals on food. Dented, cracked, torn, damaged containers should be tossed. Dishes and equipment that are broken should be disposed of. Mismatched containers (missing lids, anyone?) can be repurposed as storage bins.
The pile of odd utensils was sorted into several categories: serving tools, spatulas, used once-a-year, and what-the-heck-is-that. Coffee mugs were sorted into three groups: daily users, memorabilia, give away.
Spices and canned goods I divided into several groups also: expired, frequently used, and rarely used.

Return:
Place the saved items to the clean and dry space. Organize the stacks by item type and arrange by size. Neatly stored items are more likely to be used. You’ll save money by not purchasing duplicate, unnecessary items. You will cut down on waste because you can see what you have and you will use it.
The spices and canned goods that I use frequently were placed in a prime spot. The rarely used items were placed on a higher shelf or at the back of the shelf. The utensils that I use for speciall occasions, those were packaged up and placed in a bin on a super high shelf (think Holiday turkey carving tools). The ones used daily went back into the drawer next to the stove.
Dispose:
Toss, donate or give away things that are expired, broken or unused. Expired spices – straight into the trash can. Broken and chipped coffee mugs met with the same fate. Coffee mugs that were in good condition, simply not used, were donated.
Clearing out the clutter feels good!
Get started on regaining your kitchen and clearing out the chaos today. Use my printable plan and checklist to get going. Click here to get your copy.

Interested in one of the books pictured above? You can purchase on Amazon here.
Follow ApronFreeCooking:
Twitter – @ApronFreeCook
This post may contain affiliate links. There are no additional costs passed on to you if you click on the links in this post. Any money earned from commission helps me cover the cost of maintaining this website.


mryj55
2yb2d5
teo29f
koh97q
j5p61z
7b1qg5